
Most air conditioners that won’t power on come down to four things: a thermostat setting or dead batteries, a tripped breaker, a clogged filter choking airflow, or a full condensate pan tripping the safety float switch. Check those first, resetting a tripped breaker only once. If you smell burning, see ice on the lines, or the breaker trips again, stop and call a technician.
TL;DR:
- Most no-start AC units are affected by simple issues like dead thermostat batteries, tripped breakers, or clogged filters, and these should be checked first.
- Repeated breaker trips indicate an underlying electrical fault that requires a licensed technician and should not be reset repeatedly to avoid damage.
- Dirty filters or frozen coils caused by airflow restrictions are common causes of system shutdown and must be addressed to prevent stress on the compressor.
- A clogged condensate drain can trigger safety switches that cut power, making cleaning or vinegar flushing a simple fix before calling a professional.
- Symptoms like humming, clicking, or burning smells usually involve components such as capacitors or contactors that need specialized testing and should never be handled DIY.
Table of Contents
- Why Is My AC Not Turning On? Quick Troubleshooting Checklist
- Could a Thermostat Problem Be the Real Issue?
- How Do You Reset a Tripped Breaker or Disconnect?
- Is a Dirty Filter Blocking Your AC From Starting?
- Why Does a Clogged Condensate Drain Stop an AC?
- What Does Humming or Clicking From the Outdoor Unit Mean?
- When Should You Stop and Call an Emergency HVAC Tech?
- What Will a Technician Actually Check?
- How Do You Prevent Future No-Start Problems?
- Could Bad Wiring or a Faulty Relay Be the Cause?
- Should You Check Refrigerant Levels Yourself?
- Can Blocked Vents or Duct Damage Stop the System From Starting?
- What Does the AC’s Control Board Actually Do?
- Did a Recent Power Outage or Surge Cause This?
- An Editor’s Take on DIY Limits and When to Call In Help
- Get Matched With a Licensed HVAC Pro Near You
- Sources
- FAQ
Why Is My AC Not Turning On? Quick Troubleshooting Checklist
Before you touch anything mechanical, run through this list in order. It takes about ten minutes and rules out a large majority of no-power complaints, since most no-start calls trace back to the thermostat, breaker, or filter.
- Thermostat. Confirm it’s set to COOL, the temperature is at least 5 degrees below room temperature, and the display is lit. Swap the batteries if it’s blank.
- Breakers and disconnect. Find the HVAC breaker in your electrical panel and the disconnect box near the outdoor unit. Reset each once.
- Filter. Pull it out and hold it up to a light. If you can’t see light through it, replace it.
- Outdoor unit. Walk outside and clear leaves, grass clippings, or a fallen branch away from the condenser.
- Drain pan. Look for standing water near the indoor unit. A full pan usually means a tripped float switch.
Pro Tip: Snap a photo of your thermostat settings and the outdoor unit before you start troubleshooting. If you end up calling a technician, those photos speed up the diagnosis and can shave time off the visit.
Could a Thermostat Problem Be the Real Issue?
A dead or misconfigured thermostat is the cheapest possible explanation for an AC that won’t respond, and it’s worth ruling out completely before you assume something mechanical has failed.
Check these before moving on:
- Mode is set to COOL, not OFF, HEAT, or FAN ONLY.
- The setpoint sits at least 5°F below the current room temperature. A thermostat set to 74°F in a 72°F room has nothing to call for.
- The screen isn’t blank or flickering. Dead batteries are one of the most common reasons an AC unit not starting turns out to be nothing more than a $4 fix.
- Any smart thermostat app shows the system as “online” and connected to Wi-Fi. A dropped connection can leave a smart thermostat unable to send the call-for-cool signal even though the screen looks normal.
There’s a wiring trick some technicians use called a jumper test, where you briefly bridge two thermostat wires at the equipment to see if the system fires up without the thermostat in the loop. It’s a legitimate diagnostic, but it involves touching live low-voltage wiring at your air handler, and getting it wrong can trip a breaker or damage the control board. Leave that one to a pro unless you’re comfortable working inside HVAC equipment.
If you have a programmable or smart thermostat, check the schedule too. A vacation mode or an away setting left active from last week is a surprisingly common reason an air conditioner won’t turn on when everyone expects it to.
How Do You Reset a Tripped Breaker or Disconnect?
Power problems are the second most common reason an air conditioner won’t power on, and they’re usually the easiest to confirm.
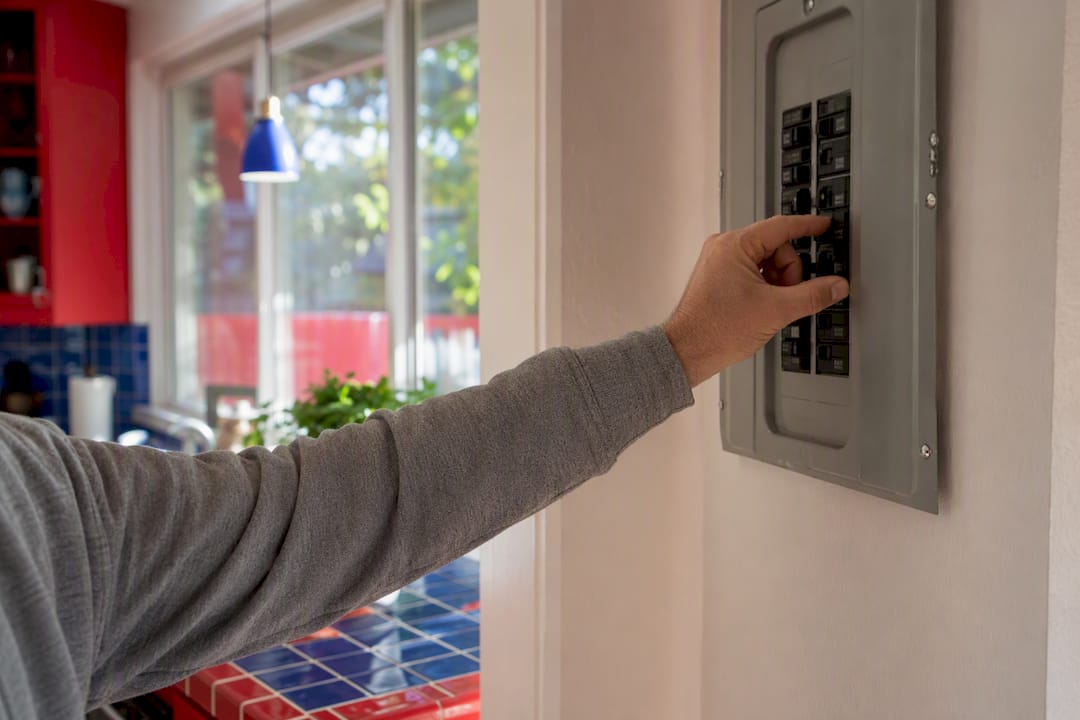
Your HVAC system typically runs on two separate circuits: one for the indoor air handler or furnace, and one for the outdoor condenser. Both breakers live in your main electrical panel, often labeled “AC” or “HVAC.” Near the outdoor unit itself, you’ll also find a small gray disconnect box, sometimes with a pull-out fuse block inside.
Here’s the safe sequence:
- Open the panel, locate the labeled breaker, and flip it fully off, then fully on. A breaker sitting in a “middle” position that looks on but isn’t fully seated is a frequent culprit.
- Check the outdoor disconnect box. Make sure the pull-out block is fully inserted and hasn’t slipped.
- Look at any visible fuses for a blown filament, but don’t pull or handle them if you’re not sure how.
One reset attempt is the limit. If the breaker trips again immediately, that’s not a fluke. It usually points to a short, a failing compressor drawing too much current, or a wiring fault, and those require a licensed electrician or HVAC technician, not another flip of the switch.
A breaker that trips repeatedly is one of the clearest signals that something electrical has actually failed, rather than just needing a reset. Continuing to force a reset can cause worse, more expensive damage to the compressor or wiring.
Is a Dirty Filter Blocking Your AC From Starting?
A dirty air filter is the single most common homeowner-fixable cause of HVAC trouble, and its effects go beyond weak airflow. It can cause the whole system to shut itself down.
Here’s what to check:
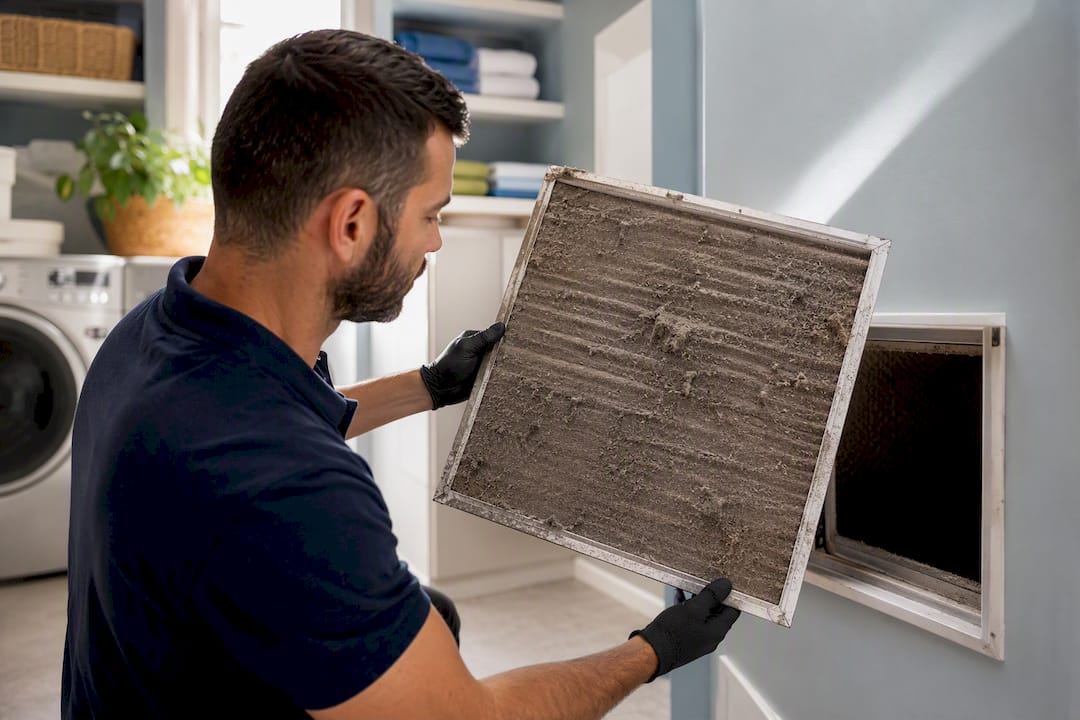
- Pull the filter and hold it up to a light source. If light barely gets through, replace it. Filters need regular replacement, especially if you have pets.
- Walk your house and check that supply registers and return vents are open, not blocked by furniture, rugs, or boxes.
- Look at the indoor coil (the evaporator, usually inside the air handler cabinet) for a layer of ice. A frozen coil means airflow has been restricted for a while.
If you find ice, turn the system off completely and let it thaw for several hours before restarting. Running a frozen system tries to push refrigerant through blocked coils, which stresses the compressor and can shorten its life. Restricted airflow also causes the system to short cycle, turning on and off in rapid bursts that wear out components faster than normal use ever would.
Pro Tip: Write the filter replacement date on the filter frame with a marker. It sounds simple, but it’s the easiest way to stop guessing whether you changed it two months ago or six.
Why Does a Clogged Condensate Drain Stop an AC?
Here’s the one most homeowners never see coming: a clogged condensate line hundreds of miles from anything electrical can shut your whole system down, and it’s by design.
Every AC pulls moisture out of the air and drains it through a small PVC line, usually ending near your outdoor unit or through an exterior wall. When that line clogs with algae or debris, water backs up into the drain pan. A float switch sitting in that pan senses the rising water and cuts power to the system to prevent an overflow from damaging your ceiling or floors. This is one of the most common hidden reasons an AC won’t turn on, and it’s often mistaken for something far more serious.
To clear it yourself:
- Find the exterior drain outlet, usually a white PVC pipe near the condenser or exiting a wall.
- Attach a wet/dry vacuum to the end of that pipe and run it for a minute or two to pull the clog out.
- If you don’t have a shop vac, pour a cup of distilled vinegar into the drain access point near the indoor unit every few months to prevent buildup.
Never bypass or disable the float switch to force the system on. It’s doing exactly what it’s supposed to do. If you clear the line and water keeps coming back, or the pan is already overflowing, that’s a job for a technician.
What Does Humming or Clicking From the Outdoor Unit Mean?
A humming noise with no fan movement, or a single click followed by silence, almost always points to a failed start component, not something you can fix with a screwdriver.
The two usual suspects are the capacitor and the contactor. The capacitor stores an electrical charge that gives the compressor and fan motor the jolt they need to start spinning. When it fails, the motor tries to start, hums under the strain, and gives up. The contactor is the relay that actually connects power to the outdoor unit; a pitted or stuck contactor can prevent that connection entirely, sometimes with an audible click but no follow-through.
Here’s why this isn’t a DIY repair:
- Capacitors hold a charge even after power is cut, and touching the wrong terminals can deliver a serious shock.
- Contactors carry high voltage and sit close to other live components inside the condenser cabinet.
- Diagnosing which component failed requires a multimeter and training most homeowners don’t have.
Pro Tip: If you hear grinding metal, smell anything burning, or see smoke near the outdoor unit, shut off the breaker immediately and step away. Don’t try to identify the cause first.
When Should You Stop and Call an Emergency HVAC Tech?
Some symptoms mean stop troubleshooting immediately and get a professional on the phone, full stop.
Call for emergency service right away if:
- You smell burning plastic, ozone, or gas near the equipment.
- You see smoke, sparks, or scorch marks on the unit or panel.
- Indoor temperature has climbed above 85°F and the home has infants, elderly residents, or anyone with a health condition sensitive to heat.
- The breaker trips again after a single reset.
Whether your situation counts as a true HVAC emergency often comes down to indoor temperature and who’s in the house. If it’s 78°F and everyone’s healthy, waiting for next-business-day service usually makes more financial sense than paying after-hours rates.
Stop DIY work and call regardless of urgency if you notice:
- Ice building up on refrigerant lines or the indoor coil.
- Loud grinding, screeching, or banging from the outdoor unit.
- A buzzing sound from the electrical panel or disconnect box.
Emergency diagnostic visits typically cost more than scheduled weekday appointments, since after-hours dispatch carries a premium almost everywhere. Ask for a written diagnostic estimate before any repair begins, and get the technician’s findings in writing, including which part failed and why, before you approve the fix.
What Will a Technician Actually Check?
Knowing the diagnostic sequence helps you understand a repair bill instead of just trusting it.
A technician typically runs through:
- A multimeter test on the capacitor’s microfarad rating against its labeled spec.
- An amp draw reading on the compressor and fan motor to catch a motor pulling more current than it should.
- A visual and functional check of the contactor for pitting or failure to close.
- Refrigerant pressure readings at the service ports if the system runs but doesn’t cool.
- A continuity check on the control board and transformer if nothing upstream explains the failure.
Most visits end with an inexpensive fix. Replacing a capacitor, contactor, or filter is common and affordable compared to a compressor replacement, which is the most expensive outcome and sometimes leads homeowners to compare repair cost against replacing the whole system.
Before the technician arrives, jot down when the problem started, any sounds you heard, and what you already tried. Ask for an itemized diagnostic sheet, the part numbers used, and warranty terms on both labor and parts in writing.
How Do You Prevent Future No-Start Problems?
Most no-start calls are preventable with a handful of habits spread across the year.
- Replace filters every 1 to 3 months, checking your system’s manual for the correct MERV rating and size.
- Keep at least 2 feet of clearance around the outdoor unit and schedule a professional coil cleaning once a year.
- Flush the condensate line with a wet/dry vacuum or vinegar treatment every few months, and have a technician inspect it during annual service.
- Book an annual tune-up rather than waiting for a failure. Ongoing maintenance catches worn capacitors and dirty coils before they cause a breakdown.
A written maintenance checklist from your service provider gives you a record of what’s been inspected and what’s coming due.
Could Bad Wiring or a Faulty Relay Be the Cause?
Wiring problems are less common than a dead thermostat battery, but they’re one of the trickier failures to self-diagnose because the symptoms often mimic something simpler.
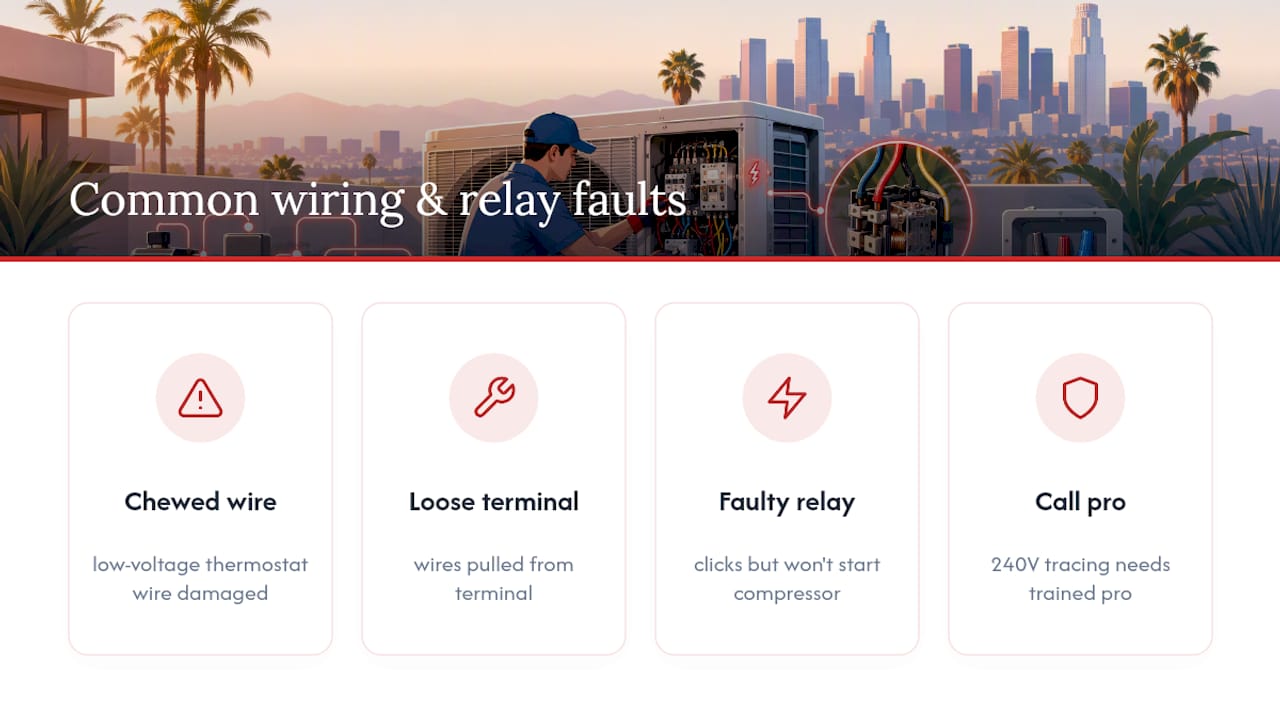
Rodents chewing through low-voltage thermostat wire in an attic or crawl space is more common than most homeowners realize, and it can produce a system that acts dead even though the breaker is fine and the thermostat display works perfectly. A loose wire connection at the air handler or outdoor unit, often from vibration over years of operation, can create an intermittent fault where the AC sometimes starts and sometimes doesn’t.
Faulty relays inside the control board or the outdoor contactor assembly cause a related problem: the system might click as if it’s trying to start, then go silent. That clicking sound without follow-through is actually useful diagnostic information, so mention it specifically if you call for service.
You can visually inspect wiring at the outdoor disconnect for obvious signs of damage, like scorched insulation, a wire that’s pulled loose from its terminal, or visible chew marks, but stop there. Testing continuity on low-voltage thermostat wiring is one thing; tracing a fault inside a 240-volt circuit is a job for someone with the right meter and training. Wiring faults hide inside walls and equipment cabinets where a visual check tells you nothing, and misdiagnosing one by trial and error risks a bigger electrical problem than the one you started with.
Should You Check Refrigerant Levels Yourself?
No. Refrigerant is one of the clearest lines between what you can check and what you shouldn’t touch, and it’s worth understanding why the system stops rather than trying to top it off yourself.
Refrigerant runs in a sealed loop. It doesn’t get “used up” during normal operation the way gasoline does in a car. If your system is low, that means it’s leaking somewhere, and simply adding more without fixing the leak just delays a bigger repair. Handling refrigerant requires certification and specialized recovery equipment under federal environmental rules, which is why it’s firmly in pro-only territory.
That said, you can watch for signs a leak might be behind a no-start or poor-cooling complaint:
- Ice forming on the copper refrigerant lines or the indoor coil, even in warm weather.
- A hissing or bubbling sound near the outdoor unit’s line connections.
- The system running constantly without ever reaching the setpoint before it eventually shuts down or trips a safety switch.
- Visibly oily residue around line connections, since refrigerant oil often leaves a trace where it escapes.
A technician confirms a leak with an electronic leak detector or a dye test, then repairs the leak point before recharging the system to the manufacturer’s specified pressure. Charging refrigerant to the wrong pressure, whether too much or too little, can damage the compressor, which is exactly the expensive outcome this whole troubleshooting process is trying to help you avoid.
Can Blocked Vents or Duct Damage Stop the System From Starting?
Ductwork problems rarely stop an AC from powering on entirely, but they create symptoms that feel exactly like a no-start complaint, and separating the two matters.
A system with severely blocked or disconnected ductwork struggles to move air, which raises pressure inside the system and can trigger the same safety shutoffs a dirty filter causes. If a duct has come loose in an attic or crawl space, or if a damper closed and got stuck, the air handler might run while producing no noticeable airflow at the vents, leading you to think the unit “isn’t turning on” when it’s actually working against a blockage.
Walk through your house and check that every supply register is open and unobstructed by furniture or rugs. Return air grilles matter just as much. A closed or blocked return starves the system of the air it needs to circulate, and multiple closed returns across a house can trip the same protective limits that a clogged filter does.
If you’ve recently had renovation work, insulation blown in, or pest activity in your attic, duct damage becomes a more likely suspect. Crushed flex duct, a disconnected joint, or an animal-damaged section won’t show up on a visual walkthrough of your living space. That level of inspection usually requires a technician to check static pressure and physically trace the duct runs, which goes beyond what a homeowner can diagnose with a flashlight.
What Does the AC’s Control Board Actually Do?
The control board is the system’s decision maker, and when it fails, the AC can look completely dead even though every other component is fine.
Think of it as the traffic controller sitting between your thermostat, the outdoor unit, and the air handler. It receives the call-for-cool signal, checks safety switches like the condensate float and any pressure switches, and then sends power to the contactor, blower motor, and other components in the correct sequence. A failed board can misinterpret that safety signal, delay a start command, or simply stop responding altogether.
Common control board symptoms include an air handler that runs but never signals the outdoor unit, a system that starts and stops erratically with no clear pattern, or indicator lights on the board itself blinking in an error code sequence. Many manufacturers use blink codes to signal specific faults, and a technician checks that sequence against the equipment manual as one of the first diagnostic steps.
You generally can’t repair or safely test a control board yourself. It involves checking low-voltage outputs with a multimeter, verifying transformer voltage, and understanding manufacturer-specific fault codes. Board issues also get misdiagnosed more than almost any other component, because the symptoms overlap so heavily with thermostat problems, tripped safety switches, and simple power issues. That overlap is exactly why the earlier checks in this guide matter. Ruling out the thermostat, breaker, filter, and drain pan first gives a technician a much narrower list of suspects if the board turns out to be the actual cause.
Did a Recent Power Outage or Surge Cause This?
If your AC stopped working right after a storm, a grid outage, or a voltage flicker in your neighborhood, the timing isn’t a coincidence.
Power surges, whether from a lightning strike, a utility grid event, or the power simply snapping back on after an outage, send a spike of voltage through your home’s wiring. HVAC systems are particularly vulnerable because they draw significant current on startup, and a surge arriving at the wrong moment can damage the control board, the capacitor, or the transformer that steps down voltage for the thermostat and controls.
A surge doesn’t always announce itself. Sometimes it trips a breaker cleanly and the system is fine once reset. Other times it fries a component quietly, and the AC simply refuses to start with no other symptoms at all. If your outage tripped the breaker, try the single reset described earlier. If the breaker holds but the system still won’t respond, suspect surge damage to an internal component rather than a simple power interruption.
Homes in areas with frequent grid instability or older electrical infrastructure benefit from a whole-house surge protector installed at the panel, plus a dedicated surge protector for the outdoor condenser unit specifically. It’s a relatively small investment against a repair bill for a fried control board or compressor, and it’s worth asking an electrician about during your next HVAC tune-up.
An Editor’s Take on DIY Limits and When to Call In Help
Most guides oversell how much a homeowner can safely fix, or undersell it entirely and tell you to call a pro for a dead thermostat battery. Neither extreme serves you well. The actual skill here is knowing which category your symptom falls into within the first five minutes, not becoming an amateur HVAC technician.
Airconditioning-heating exists for the moment you’ve run the safe checks and the system still won’t start. As a referral platform connecting homeowners across the Los Angeles area with licensed, vetted local contractors, the goal is matching you with someone qualified fast, with financing options available when a repair turns out to be bigger than expected. Before you call, write down what you tried, what you heard, and when it started. That single habit turns a guessing-game service call into a focused, faster one.
— Ygal
Get Matched With a Licensed HVAC Pro Near You
If you’ve worked through the thermostat, breaker, filter, and drain checks and the system still won’t start, the smartest next move isn’t more guessing. It’s getting a licensed technician who can safely test the capacitor, contactor, and control board without the shock hazard those repairs carry.

Airconditioning-heating connects homeowners across the Los Angeles area with vetted, licensed local contractors, not a call center reading from a script. You get matched with someone who handles air conditioning repair work regularly, and same-day availability is common when your symptoms point to something urgent. Financing options are available too, which matters if the diagnosis turns out to be a capacitor and contactor swap versus a bigger repair. If your outdoor unit is humming with no fan movement or your breaker keeps tripping, request an emergency HVAC repair referral and get connected with a local pro who can safely diagnose the problem today.
Sources
- AC Unit Not Turning On: Reasons Why And What To Do — Carrier
- DIY HVAC Troubleshooting: 12 Safe Checks & When to Call a Pro — HVACDatabase
FAQ
How do I make my AC kick on?
Start with the thermostat: confirm it’s set to COOL with the temperature at least 5°F below room temperature, then check that the batteries aren’t dead. If that doesn’t work, reset the HVAC breaker once and check the air filter for a clog.
Why is my outside AC unit not turning on?
The outdoor disconnect may have slipped out of place, or the breaker feeding the condenser has tripped. Humming with no fan movement usually points to a failed capacitor or contactor, which requires a licensed technician to safely diagnose and replace.
How do I force an AC to turn on?
You shouldn’t try to force it. Repeatedly resetting a breaker that keeps tripping, or bypassing a condensate float switch, risks damaging the compressor or causing water damage. Run the safe checks once each, and if the system still won’t start, call for a professional diagnosis.
Is a tripped breaker that won’t stay reset an emergency?
Yes. A breaker that trips again after one reset signals an electrical fault, not a fluke, and continuing to reset it risks further damage or fire hazard.
When does an AC outage count as a true emergency?
Treat it as an emergency if indoor temperature climbs above 85°F with vulnerable people in the home, or if you notice burning smells, smoke, or gas odor. Otherwise, many failures can safely wait for regular business-hour service.

