
Over 85 percent of american homes rely on some form of air conditioning, but choosing and installing the right unit can feel complicated in a place like Los Angeles. The hot climate and unique home layouts mean one size rarely fits all. Getting the best cooling setup starts with knowing your options and understanding the steps involved, so you can enjoy better comfort, lower bills, and reliable performance all summer long.
Table of Contents
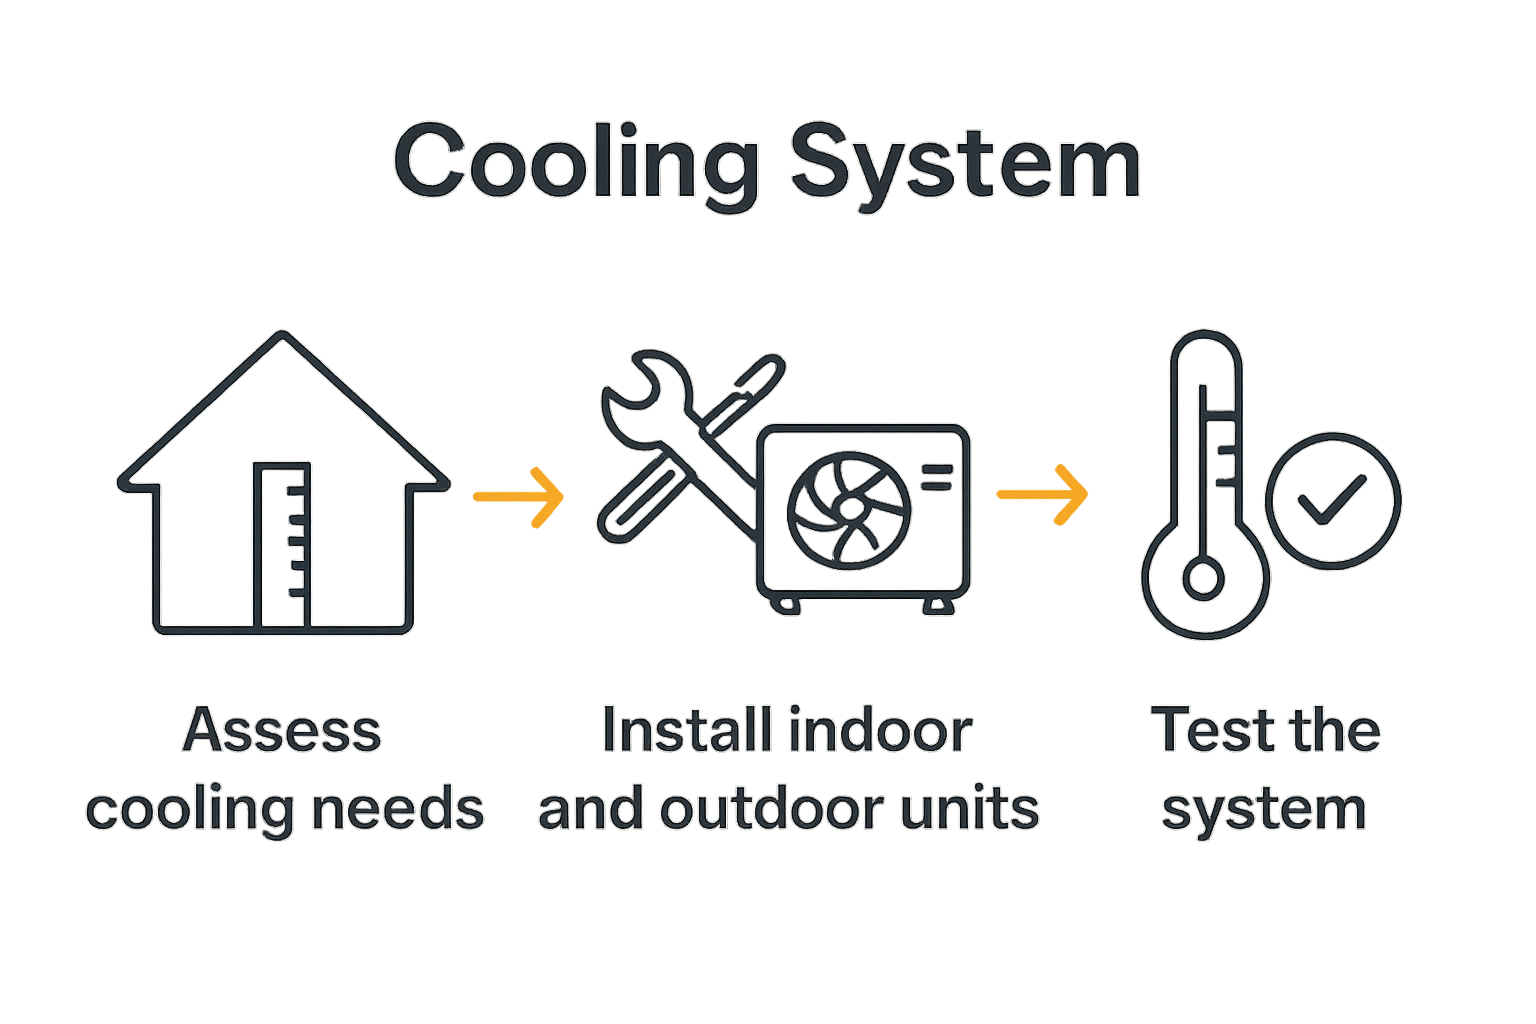
- Step 1: Assess Cooling Needs And Select Unit
- Step 2: Prepare Space And Gather Necessary Tools
- Step 3: Install Indoor And Outdoor Components
- Step 4: Connect Electrical And Refrigerant Lines
- Step 5: Test System And Verify Proper Operation
Quick Summary
| Key Point | Explanation |
|---|---|
| 1. Assess Your Cooling Needs | Evaluate your space’s size and factors influencing cooling, like insulation and sun exposure. |
| 2. Prepare Installation Space | Clear the area and gather tools for a successful air conditioning unit setup. |
| 3. Install Indoor and Outdoor Units Carefully | Properly mount units and ensure connection details are accurate for optimal efficiency. |
| 4. Connect Electrical and Refrigerant Lines Safely | Follow technical guidelines for electrical and refrigerant connections to avoid leaks and ensure safety. |
| 5. Test System Thoroughly | Verify operational performance by checking airflow, temperatures, and any unusual sounds during testing. |
Step 1: Assess Cooling Needs and Select Unit
Picking the right air conditioning unit for your Los Angeles home requires careful assessment of your specific cooling requirements. Proper sizing of your HVAC system determines energy efficiency, comfort, and long-term performance.
Start by measuring the total square footage of the space you want to cool. Most homes require about 20 British Thermal Units (BTUs) per square foot, but Los Angeles temperatures and home configurations can vary widely. Consider factors like ceiling height, window exposure, insulation quality, and room orientation. Homes with significant sun exposure or poor insulation might need additional cooling capacity. For instance, a 1000 square foot home typically needs a 20000 BTU unit, but your specific requirements could differ based on local climate conditions.
A professional HVAC assessment provides the most accurate recommendation. These experts can perform detailed heat load calculations that account for unique aspects of your home’s construction and your specific cooling needs. Many homeowners underestimate the complexity of selecting the right air conditioning system, but taking time to understand your specific requirements can save significant money and prevent future comfort issues.
Step 2: Prepare Space and Gather Necessary Tools
Before installing your air conditioning unit, proper preparation ensures a smooth and efficient process. Selecting the right installation location is crucial for optimal performance and longevity of your system.
Begin by gathering essential tools for the installation. You will need a measuring tape, electric drill, level, screwdriver, protective gloves, and safety glasses. Carefully identify the best placement area for your unit, ensuring it is away from direct sunlight, heat sources, and obstructions. Measure the space precisely to confirm the unit will fit comfortably and allow adequate airflow. Check the proximity to electrical outlets and consider the unit’s weight capacity for wall mounting or floor placement.
Prioritize creating a clean, stable environment for installation. Clear the area of furniture, dust, and potential obstacles. Ensure the surface is level and can support the unit’s weight. A stable foundation prevents vibration, reduces noise, and helps maintain the system’s efficiency. Remember that proper preparation not only simplifies the installation process but also contributes to the long-term performance of your air conditioning system.
Step 3: Install Indoor and Outdoor Components
Installing your air conditioning system involves precise placement and careful mounting of both indoor and outdoor units. Proper installation techniques are critical for ensuring optimal performance and long-term reliability.
Start with the indoor unit by marking mounting brackets securely into wall studs. Use a level to guarantee perfect horizontal alignment, which prevents water drainage issues and ensures even cooling distribution. For the outdoor compressor unit, select a location with adequate clearance that allows unrestricted airflow and minimizes exposure to direct sunlight. Ensure the surface is completely level and stable, using mounting pads or a concrete pad if necessary to reduce vibration and potential structural stress.
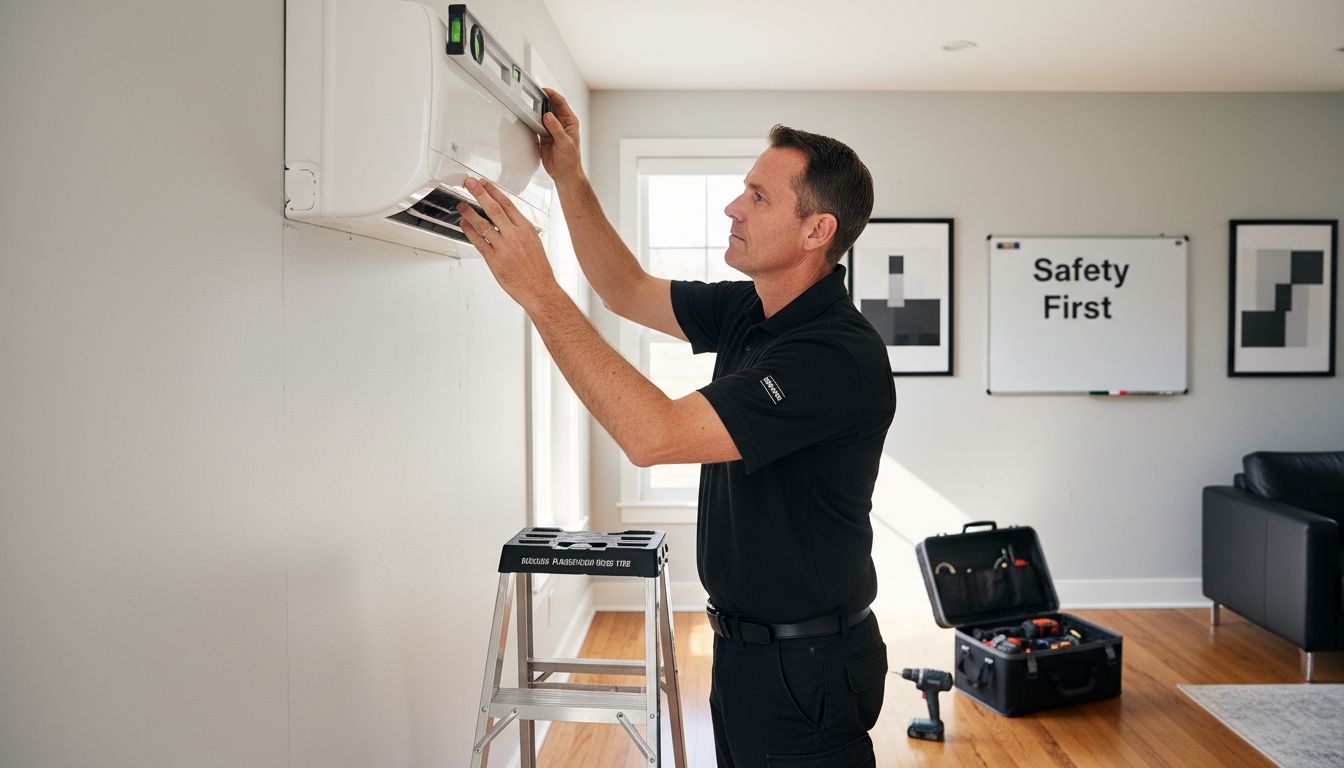
Careful attention to connection details matters significantly. Connect refrigerant lines carefully, ensuring tight seals and proper insulation to prevent energy loss. Electrical connections require precision check refrigerant line lengths and angles to maintain manufacturer specifications. Professional installation remains recommended for complex systems, as improper setup can dramatically reduce efficiency and potentially void warranty coverage. The next phase involves testing and calibrating your newly installed air conditioning system to guarantee optimal cooling performance.
Step 4: Connect Electrical and Refrigerant Lines
Connecting electrical and refrigerant lines is a critical phase of air conditioning installation that demands precision and technical expertise. Proper line installation can significantly impact your system’s overall performance and energy efficiency.
Begin with electrical connections by shutting off power at the circuit breaker and carefully routing the electrical cable from the outdoor unit to the indoor unit. Use weatherproof electrical conduit and ensure all connections are tight and properly insulated. For refrigerant lines, select high quality copper tubing and carefully flare the line connections to prevent leaks. Minimize line bends and maintain the recommended minimum bend radius to prevent potential refrigerant flow restrictions. Insulate all refrigerant lines thoroughly to prevent energy loss and maintain optimal cooling efficiency.
Exercise extreme caution during this process. Refrigerant handling requires specialized knowledge and can pose environmental and safety risks if done incorrectly. Most manufacturers recommend professional installation to ensure proper connection, prevent system damage, and maintain warranty coverage. After completing the connections, you will be ready to test and commission your new air conditioning system.
Step 5: Test System and Verify Proper Operation
Testing your newly installed air conditioning system is crucial to ensure optimal performance and identify any potential issues before they become costly problems. Systematic verification of system components will help guarantee reliable cooling for your Los Angeles home.
Begin the testing process by turning on the system and checking each operational mode. Monitor the initial startup carefully, listening for unusual sounds and observing the airflow from indoor and outdoor units. Verify refrigerant pressures and electrical connections to confirm they meet manufacturer specifications. Run the system through cooling and fan modes, checking temperature differentials and ensuring consistent airflow across different rooms. Pay close attention to temperature drops and system responsiveness while checking for any signs of refrigerant leaks or electrical irregularities.
If you notice any performance inconsistencies or unusual noises, stop the system immediately and consult a professional HVAC technician. Small issues detected during initial testing can prevent major system failures and expensive repairs down the line. Your careful testing now will help ensure reliable and efficient cooling throughout the hot Los Angeles summers.
Ensure Your Los Angeles Home Stays Cool with Expert Air Conditioning Installation
Choosing and installing the right air conditioning system can feel overwhelming. From assessing your home’s specific cooling needs to handling complex electrical and refrigerant connections, the process requires precision and experience. You want to avoid costly mistakes like improper sizing, poor placement, or faulty hookups that can reduce efficiency or cause future breakdowns.
Don’t risk your comfort during the hottest months. Our platform connects you with trusted local HVAC professionals who understand the unique challenges of Los Angeles homes. Whether you need help with unit selection, expert installation, or ongoing maintenance, you’ll find reliable contractors ready to guide you every step of the way.
Air Conditioning Installation Specialists are just a click away.

Take control of your home’s climate before the next heat wave hits by visiting airconditioning-heating.com now. Get connected with licensed contractors who deliver quality and peace of mind. Start your journey toward a cooler, more comfortable home today.
Frequently Asked Questions
How do I determine the right size air conditioning unit for my home?
To determine the right size air conditioning unit, measure the total square footage of the space you want to cool. Multiply your square footage by 20 BTUs to estimate the cooling capacity needed and adjust based on factors like insulation and sun exposure.
What tools do I need to prepare for air conditioning installation?
Essential tools for air conditioning installation include a measuring tape, electric drill, level, screwdriver, protective gloves, and safety glasses. Gather these tools before starting to ensure a smooth installation process.
What is the best location for installing my air conditioning unit?
The best location for your air conditioning unit should be away from direct sunlight, heat sources, and obstacles that can restrict airflow. Carefully measure the area to confirm that the unit fits comfortably and has sufficient clearance for optimal performance.
How do I safely connect electrical and refrigerant lines during installation?
To connect electrical and refrigerant lines, shut off power at the circuit breaker and carefully route the electrical cable between the indoor and outdoor units. Use high-quality materials and ensure all connections are tight to prevent leaks and maintain efficiency.
What should I check during the testing phase of the installation?
During the testing phase, check that the system turns on properly and that airflow is consistent from both indoor and outdoor units. Monitor for unusual sounds, verify refrigerant pressures, and ensure that the unit responds correctly in various operating modes.
When should I consult a professional HVAC technician?
Consult a professional HVAC technician if you encounter any performance issues or unusual noises during testing. Addressing small problems early can prevent major failures and costly repairs down the line.
Recommended
- #1 HVAC Company Los Angeles, CA | HVAC Pros | 877-999-0253
- #1 HVAC Company Los Angeles, CA | HVAC Pros | 877-999-0253
- #1 HVAC Company Los Angeles, CA | HVAC Pros | 877-999-0253
- #1 HVAC Company Los Angeles, CA | HVAC Pros | 877-999-0253
- Kitchen Faucet Repair – Orange County, California – MDTECH APPLIANCE REPAIR
